Clonezilla Bootable USB
- CITLead
- May 31, 2020
- 1 min read
Clonezilla is an Open Source Software for imaging and cloning. I have used Clonezilla to clone the Windows 10 system for mass deployment. In this post, we will cover setting up a bootable Clonezilla USB drive to clone Windows 10.
PROS:
Fast setup
Imaging/Cloning process is fast
Works in most scenarios
CONS:
Distribution the image
Manging the image
When restoring an image the hard drive must be the same size or bigger.
We will be following the Live CD/USB guide on Clonezilla site (https://clonezilla.org/liveusb.php).
Let's start off creating a bootable USB.

Right-click the Windows Start icon and click on Disk Management
I have a 60GB USB plugged, you can see it below as Disk 1.

Right-click and select New Simple Volume... We want to create two partitions on the USB.


Click Next to start the wizard

Let create a 5000MB volume, then click Next

Click Next
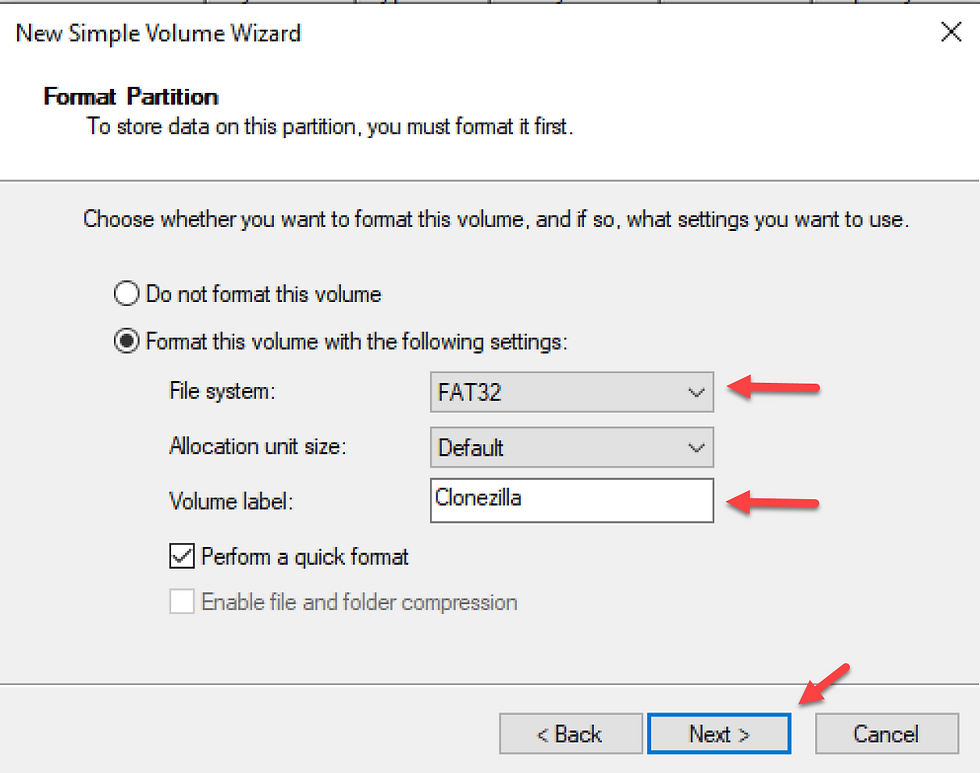
Change the File system to FAT32 and you can set the Volume label to Clonezilla. Now click Next.

Click Finish to complete the wizard.
Your USB should look like below.

Create a new partition with what's left on the USB, set the File system as NTFS, and set the Volume label as Storage. It should now look like below.


The Clonezilla documentation says to download Tuxboot. I downloaded Tuxboot-0.8.2.exe and have it on my desktop. I have also downloaded the Clonezilla stable 2.6.6-15 iso.
Click on Pre Downloaded and click on the three dots and select the Clonezilla stable 2.6.6-15 iso file. Under Drive select the 5000MB USB partition and click OK.

Once Tuxboot is done running you should now have a bootable Clonezilla USB.


Comments